
In each muscle study, we’ll take a look at a muscle group, and examine what its purpose is in the body. Then using that information, we’ll take a look at a few ways to exercise the muscle and close with a sample workout that should effectively work the muscle. There may be some biological / technical jargon in this, but I’ll do my best to explain in plain English the terminology we’re throwing around as we go along!
The abdominals (the abs) refer to any of the muscles on the anterolateral (the front and side) walls of the abdominal cavity. There are four muscle groups associated with the abs: the external oblique on the sides of the body, the internal obliques – which sit underneath the external oblique, the transverse abdominis which runs horizontally across your stomach which sits beneath the rectus abdominus. The rectus abdominus is the muscle group that most people are familiar with when they think of the abs. This is the group that is commonly referred to as a “six pack” when it is well developed and the body fat percentage is low enough to see it.
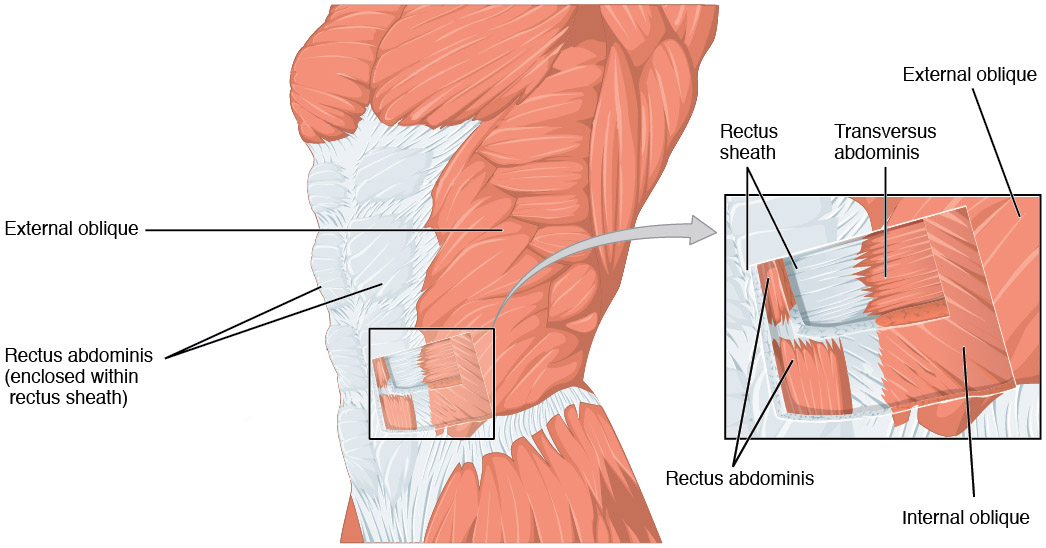
The External Oblique
The external oblique is the largest and outermost muscle of your abdomen. In layman’s terms, this muscle is your “side muscle”. It has numerous origin points along the ribcage (ribs 5-12) up to just underneath the chest (Pectorals) and the xiphoid process and insertion points along the pelvis. This muscles primary function is to compress the abdominal cavity by pulling the chest toward the pelvis. It comes into play in this role when bending forward, or to the side. It is also used in rotational movement of the chest while the lower body and hips remain stationary.
The Internal Oblique
The internal oblique sits underneath the external oblique. The origin points of the internal oblique are almost the opposite of the external oblique. It originates along the lower abdomen, in the inguinal ligament (in the crease of the leg where the leg meets the abdomen), the pelvis and the lumbrodorsal fascia (as far as I can tell, this is the outer area of the lower back). The insertion points are the linea alba – the center of the abdomen which is sunken in on someone with a “six pack”, the Pectineal line of the pubis and ribs 10-12. This muscles primary function is to assist in breathing by reducing the volume of the chest during exhalation and also in rotational movement of the chest, working opposite of the external oblique to assist with rotation.
The Transverse Abdominis
The transverse abdominus (we’ll call it the TrA) is the innermost muscle of the abdomen, sitting underneath the internal obliques. It’s origin points are the Iliac crest (the top of the pelvis), inguinal ligament, thoracolumbar fascia, and costal cartilages 7-12. The insertion points are the Xiphoid process, linea alba, pubic crest and pecten pubis via conjoint tendon. The transverse abdominal helps provide pelvic stability and compresses the ribs and viscera – in simple terms, this muscle helps hold everything in place in your abdominal cavity, and helps provide a stable spine. In fact, this muscle has a nickname – the corset muscle. When you “suck it in”, this is the muscle you’re contracting. This is also the muscle that helps a woman deliver a child.
The Rectus Abdominis
The rectus abdominis is what most people refer to when they say the “abs”. It’s a paired muscle running down both sides of the innermost abdomen, separated by a midline (the linea alba). It’s origin point is the crest of the pubis, and it’s insertion points are the costal cartilages of ribs 5-7 and the Xiphoid process of the sternum. The rectus abdominis is a postural muscle which, along with the external oblique flexes the lumbar spine forward in a movement similar to a crunch or sit-up. This muscle also assists with breathing (notable when forcing an exhalation).
So How Do We Best Work These Muscles?
By understanding how these muscles interact with the body, we can begin to examine the best ways to engage them in exercise for maximum effect. Because the abdominals move the body in several different ways – up and down, sided to side and rotationally, we’ll look at three different ways that will effectively help you to train these muscles.
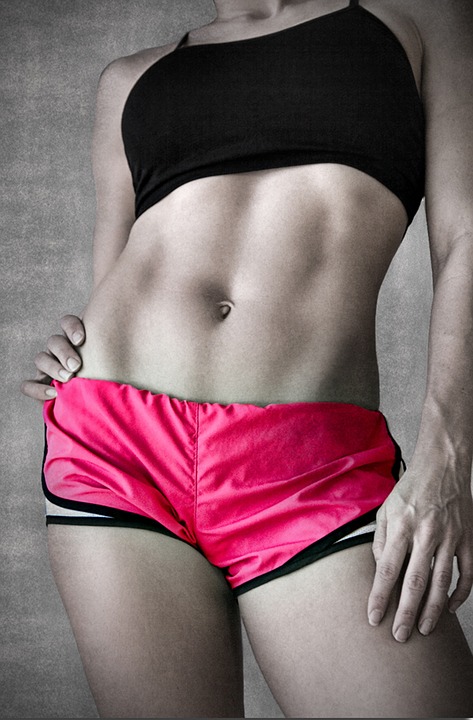
One caveat to remember when working the abs (get ready to make mean faces at me). If you want a six or eight pack, exercising your abs alone WILL NOT GET YOU THERE. Unfortunately, no amount of training in the gym will overcome a bad fork. Exercise strengthens muscles, it doesn’t burn fat in and of itself, so you may have a six pack, but it will be hidden under layers of fat. In order to see a six pack, men need a body fat percentage of around 6 to 9 percent, and women need to reach 16 to 19 percent.
That doesn’t mean you shouldn’t train these muscles if you’re not willing to get your diet in check. On the contrary, a strong core is essential to most fitness related activities, but you shouldn’t expect to see these muscles in any significant way unless you’re also willing to put in the work in the kitchen to lower your body fat percentage. I know, it sucks, it’s not fair, but that’s just how it goes sometimes in life.
With that said, let’s take a look at three different exercises we can do to target the muscle fully, examine why they work, and how to properly perform them to best effect.
The 3-Step Sit-Up
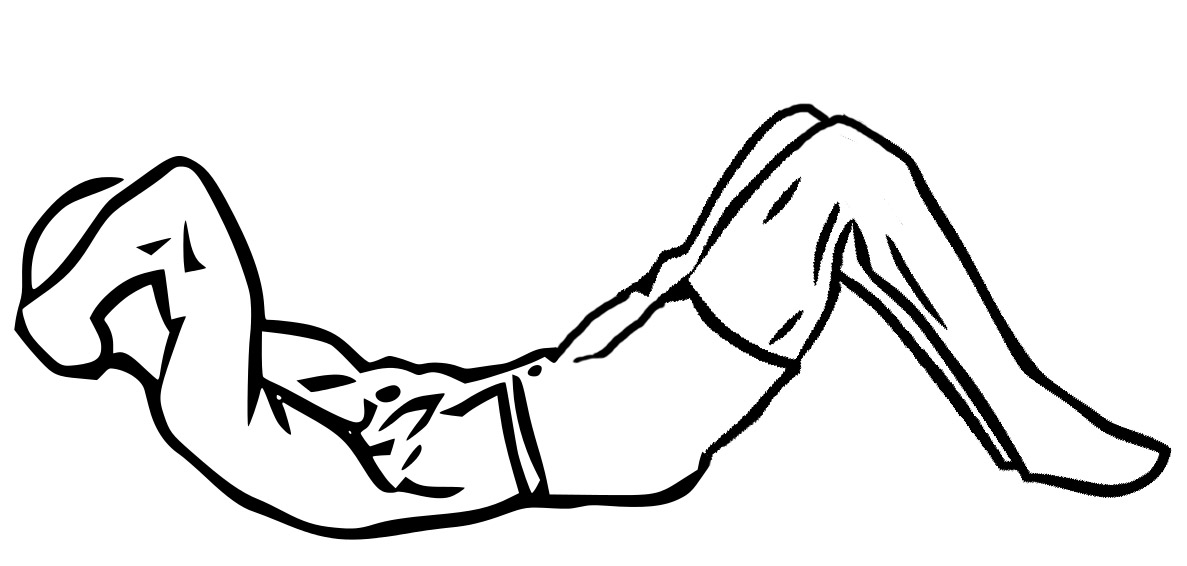
The sit-up is a great exercise that primarily targets the external obliques and the rectus abdominis. It’s not as safe for your back as a crunch, so if you have back issues, please be careful performing this exercise. I chose the sit up over the crunch however because it’s a fuller range of motion, and when performed correctly, works more of the rectus abdominis than the crunch does.
When performing the exercise, your shoulders should be back and down (pinching the shoulder blades together slightly) initially. Unlike most of the exercises I outline in the Muscle studies, the back will change posture during the movement, starting out flat against the floor, and curving as you “roll up” during the move. Ab exercises are not to be performed quickly. you’ll see people performing sit ups and crunches all the time as quickly as they can, but slow and steady works the muscle harder and increases the results you’ll see.
1Lie down on the floor on your back, and bend your knees, planting your feet flat on the floor. The arms should be either crossed over the chest, or placed elbows bent, with your hands next to your ears (not laced behind the neck). Inhale. Two important tips here:
- As noted the hands are NOT to be placed behind the neck. The urge will be to pull on your neck as the movement becomes harder, which can cause injury, and also lessens the effect of the exercise.
- The hands are to remain next to the ears (or crossed over the chest). This is to keep you from cheating the exercise by “throwing” your arms forward, causing momentum to help you up and thereby lessening the effect of the movement.
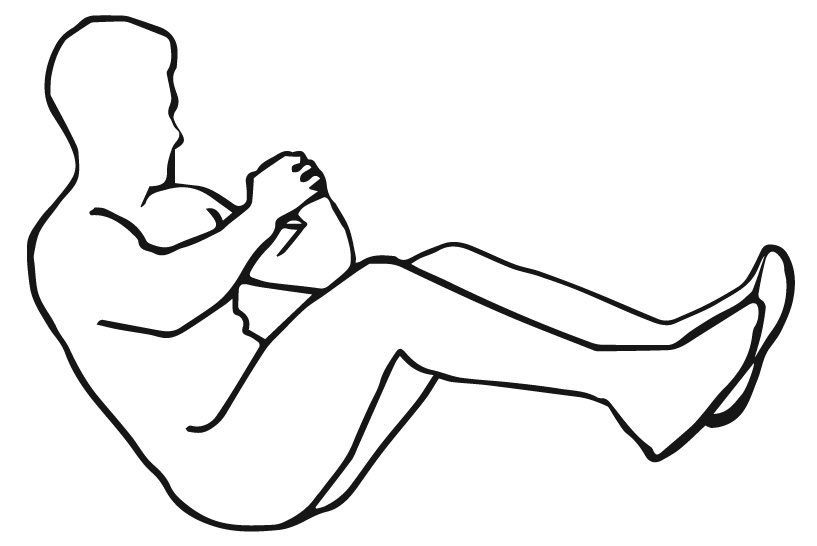
2Roll the body slowly forward and upward, allowing your spine to curve and focusing on squeezing the muscles of the abdomen. Make the muscles do the work of pulling you forward toward your knees. When upright, squeeze the muscles of the stomach and hold for a 1-2 second mental count. This hold should not be a break – you should be feeling the muscle contract hard during the hold.
3Exhale and slowly return to the starting position, rolling your body backward one vertebra at a time. Rest for a mental count of 1 or 2 (this is your break) and repeat the movement until failure (the point at which you cannot perform another movement, or you cannot perform another movement without sacrificing form).
The 3-Step Russian Twist
The Russian Twist may be performed either with or without a weight, dumb bell or medicine ball. The Russian twist targets both the external and internal obliques
When performing the exercise, your shoulders should be back and down (pinching the shoulder blades together slightly). The back should remain straight (except for the rotational movements). As before, ab exercises should not to be performed quickly So take it slow to work the muscle harder and increase the results.
1Begin by sitting on the floor with your legs in front of you, knees bent at an approximate 45 degree angle. Your feet may either be placed on the floor, or raised in the air. Hold the weight against your chest with both hands, elbows out to the side. If performing the exercise without a weight, you should be in the same position, with the elbows out to the sides of your body. Lean back to an approximate 45 degree angle, keeping your back flat and as straight as possible. Engage and squeeze the abdominal muscles. Inhale.
2Exhale and twist the body to the right side until the elbows come close to or make contact with the floor. Squeeze the abdominal muscles. You should feel the squeeze along your sides – especially on the side facing the floor.
3Inhale as you slowly return to the starting position, focusing on keeping the spine straight and the core engaged to control the movement. Once in the starting position, repeat the movement to the left side, returning again to the start position and count this as one repetition. Continue the movement until failure (the point at which you cannot perform another movement, or you cannot perform another movement without sacrificing form).
The Vacuum Exercise
OK, full disclosure, I had never heard of this prior to writing this post, but I wanted to provide an exercise that specifically targeted the transverse abdominis. The Vacuum Exercise is also called “Abdominal Hollowing”. By performing this movement while performing another ab exercise, you can better active the TrA and effectively target this muscle. Since this can be used in conjunction with other exercises, we’ll break tradition with the 1-2-3 step description and simply explain how to add this to your core worklouts.
In trying to describe how to do this, I found the best description from our friends at Livestrong.com who describe it thusly:
“Perform this move by lying on your back and drawing in your lower abdomen below your navel. Avoid moving the back, pelvis or upper abdomen, all the while continuing to breathe.”
You don’t have to be lying down to perform this either. Once you’ve practiced it, you can apply it to a plank, a sit-up, or even the Russian twist outlined above. Interestingly, you can also perform this movement on it’s own as an exercise to strengthen the TrA by holding it for prolonged stretches of time – probably a good idea before adding it to another exercise. Here’s a resource that outlines this concept and may better show what Livestrong is describing:
Stretch That Thing!
Strengthening the muscle isn’t good enough. You want a functional, strong, lean muscle that not only looks good, but that you can rely on. If you don’t stretch your muscles, you’ll begin developing range of motion issues that you don’t want. My rule of thumb – any time you work a muscle, you should also stretch the muscle. A few stretches you could perform after an ab workout might be:
Wrap Up
There are many reasons to exercise this muscle group, ranging from functionality to simply aesthetic reasons. The abs are probably one of, if not the most important muscle groups for any fit activity. They help to stabilize and protect the spine during MANY movements, and should not be neglected. Hopefully this article sheds some light on the complexity of this popular muscle group, and increases your knowledge of how it’s used by your body. I’d love to hear your thoughts on ideas how you might be able to train it to work even harder.
Know someone who might like this article? Please share it with them, or via your social media network, it helps the blog out, and you never know who you might be responsible for motivating to live a healthier lifestyle!
Resources
